Do You Need Clamps for Liquid Nails?
Using clamps with Liquid Nails is essential for strong adhesion. They evenly distribute pressure, vital for porous surfaces. Clamps hold materials in place while curing and allow hands-free work. For a successful project, consider surface, adhesive formulation, and weight capacity needed. Alternatives like weight placement or taping can work in some cases. To apply without clamps, ensure strategic positioning and even pressure. Utilizing gravity can aid in bonding, especially overhead. For proper clamping, distribute pressure evenly, avoid gaps, and use the right size clamps. To learn more about techniques and common mistakes, follow the expert advice provided.
Key Takeaways
- Clamps ensure even pressure for strong adhesion.
- Necessary for porous or uneven surfaces.
- Holds materials in place during curing process.
- Enables hands-free operation for convenience.
- Crucial for optimal bonding strength and durability.
Importance of Using Clamps With Liquid Nails
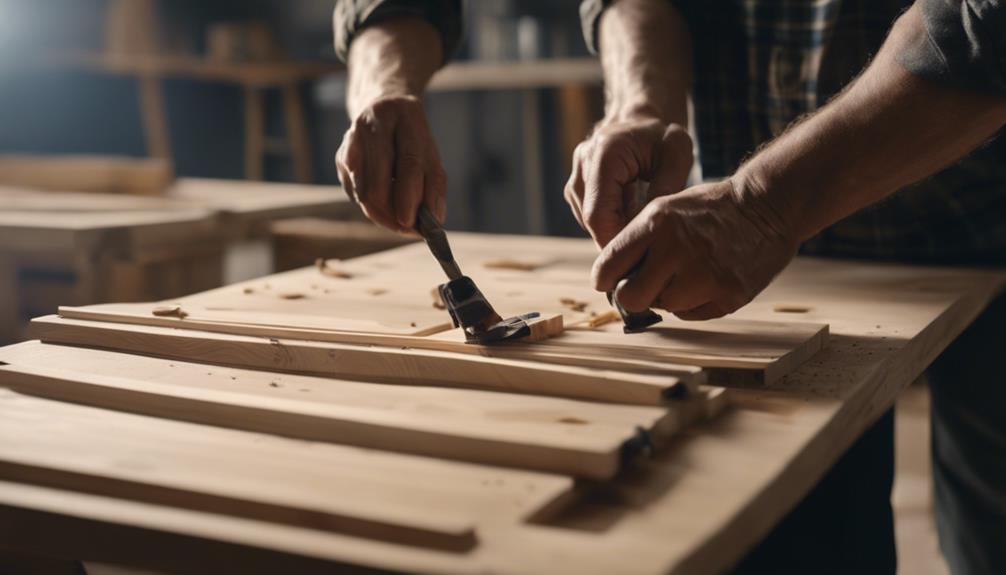
Ensuring proper adhesion and bonding strength, the use of clamps with Liquid Nails is crucial in various construction and DIY projects. By applying pressure evenly across the surface being bonded, clamps help to eliminate air gaps and ensure a tight and secure bond. This is especially important when working with porous or uneven surfaces where adhesives alone may not provide sufficient strength.
Clamps play a significant role in holding materials together while the Liquid Nails adhesive cures. This is essential for maintaining alignment and preventing any shifting or separation during the drying process. Additionally, clamps allow for hands-free operation, enabling the individual to focus on other aspects of the project without having to manually support the materials being bonded.
Innovations in clamp design have led to the development of various types and sizes, catering to different project requirements. From traditional bar clamps to quick-release clamps and spring clamps, there is a wide range of options available to suit specific needs. When used in conjunction with Liquid Nails, these clamps enhance the overall efficiency and effectiveness of the bonding process, resulting in stronger and more durable constructions.
Factors to Consider Before Using Clamps
Before utilizing clamps with Liquid Nails, it is essential to carefully assess the surface materials and project requirements to ensure optimal bonding results. The first factor to consider is the type of materials being bonded. Different surfaces require specific formulations of Liquid Nails for maximum adhesion. It is crucial to select the appropriate product to match the materials involved in the project. Additionally, consider the weight-bearing capacity needed for the application. Heavier materials or objects may require stronger adhesives and additional support beyond clamps to ensure a secure bond.
Another critical factor is the environmental conditions. Factors such as temperature, humidity, and exposure to elements can impact the curing process and overall bond strength of Liquid Nails. Ensure that the conditions are suitable for the adhesive to set properly. Moreover, the size and complexity of the project play a significant role in determining whether clamps are necessary. Larger projects with intricate designs may benefit from using clamps to hold the materials in place while the adhesive cures, ensuring a precise and durable bond.
Alternatives to Clamps for Liquid Nails
When it comes to applying Liquid Nails without clamps, there are several alternative techniques that can be effective. Utilizing methods such as clampless application, leveraging gravity as a bonding aid, or applying weighted pressure can all assist in achieving a strong bond without traditional clamps. These alternatives offer flexibility and creativity in securing materials with Liquid Nails when clamps are not available or practical.
Clampless Application Techniques
For applying Liquid Nails without clamps, consider utilizing strategic weight distribution to secure the bonding surfaces effectively. This method can provide a strong bond while allowing for a clamp-free application process. Here are some innovative clampless application techniques to enhance your adhesive projects:
- Strategic Weight Placement: Position heavy objects strategically on the bonded surfaces.
- Temporary Bracing: Prop up the materials with temporary supports until the adhesive sets.
- Pressure Application: Apply pressure evenly across the surfaces using your hands or a roller.
- Tape Method: Secure the materials in place with high-quality tape during the curing process.
- Inverted Bonding: Flip the materials upside down to utilize gravity in the bonding process.
Gravity as Bonding Aid
To optimize the effectiveness of Liquid Nails application without clamps, leveraging gravity as a bonding aid presents a practical and efficient alternative for securing bonding surfaces. By applying Liquid Nails to the surface and then positioning the materials vertically or horizontally so that gravity helps press them together, a strong bond can be achieved without the need for clamps. This method is particularly useful for overhead applications where clamps may be impractical. Gravity-assisted bonding allows for hands-free operation, enabling the adhesive to set properly while ensuring a secure attachment. When using this technique, it is essential to ensure that the materials are properly aligned and supported to prevent any slippage during the bonding process.
Weighted Pressure Options
Leveraging weighted pressure as an alternative to clamps for Liquid Nails applications offers a practical solution for achieving strong bonds between materials. This method can be efficient and effective, especially in situations where clamps may not be readily available or feasible to use. Here are five innovative weighted pressure options to consider:
- Brick or Concrete Blocks: Providing substantial and consistent pressure.
- Heavy Books or Toolboxes: Distributing weight evenly for a secure bond.
- Sandbags: Offering flexibility in shaping and molding to apply pressure.
- Weighted Plates: Applying direct and concentrated force where needed.
- Exercise Weights: Providing adjustable pressure for different project requirements.
These alternatives can enhance the bonding process while allowing for versatility and creativity in your projects.
Tips for Proper Clamping Techniques
Implementing correct clamping techniques is essential for ensuring a strong and long-lasting bond when using liquid nails. To maximize the effectiveness of liquid nails, proper clamping is crucial. Here are some tips to help you achieve optimal results:
- Even Distribution: Ensure that pressure is evenly distributed across the surface to prevent any gaps or weak spots in the bond. This can be achieved by using multiple clamps or applying pressure at various points along the joint.
- Appropriate Pressure: Apply the right amount of pressure when clamping. Too much pressure can squeeze out the adhesive, while too little may result in a weak bond. Find the balance that works best for the specific project.
- Clamp Placement: Position the clamps strategically to target the areas that require the most support. Placing the clamps closer to the edges can help prevent any potential warping or misalignment.
Common Mistakes When Using Clamps
When using clamps with Liquid Nails, it's crucial to avoid common mistakes to ensure a successful bonding process. Proper clamp placement is essential to evenly distribute pressure and prevent uneven drying or curing. Controlling clamping pressure and selecting the correct type of clamp for the specific project are key factors in achieving strong and durable bonds.
Proper Clamp Placement
To ensure optimal bond strength and prevent any potential damage to your workpiece, precise and strategic placement of clamps is crucial when using Liquid Nails. Improper clamp placement can lead to uneven pressure distribution, weakening the adhesive bond and risking project integrity. Here are some common mistakes to avoid:
- Placing clamps too close to the edge: This can cause the adhesive to squeeze out and weaken the bond.
- Using too few clamps for the size of the project: Insufficient clamps may result in gaps or uneven pressure.
- Neglecting to adjust clamp positions during drying: This can lead to misalignment or warping of the materials.
- Not ensuring parallel alignment of clamps: Misaligned clamps can create stress points.
- Leaving excess adhesive unclamped: Properly secure all areas where adhesive is applied for a strong bond.
Clamping Pressure Control
Effective control of clamping pressure is essential for ensuring a successful bond when using Liquid Nails, as improper pressure management can compromise the adhesive strength and the overall quality of the project. One common mistake is applying too much pressure, which can squeeze out too much adhesive, weakening the bond. Conversely, insufficient pressure may result in gaps where the adhesive doesn't make proper contact, leading to a weak bond. Finding the right balance is key. Utilizing pressure-sensitive clamps or adjustable clamps can help maintain optimal pressure during the bonding process. Below is a table highlighting common mistakes and solutions in clamping pressure control:
| Common Mistakes | Effects | Solutions |
|---|---|---|
| Too much pressure | Squeezes out adhesive | Use pressure-sensitive clamps |
| Insufficient pressure | Gaps in bonding | Opt for adjustable clamps |
| Uneven pressure | Uneven bond strength | Utilize pressure distribution pads |
Choosing Correct Clamp
Selecting the appropriate clamp is crucial in ensuring the effectiveness of the bonding process when using Liquid Nails, as the wrong choice can lead to suboptimal results. When choosing the correct clamp, avoid these common mistakes:
- Using a clamp that is too large or too small for the project
- Neglecting to adjust the clamp pressure according to the material being bonded
- Using a clamp with worn-out or damaged pads that can affect the bond
- Underestimating the number of clamps needed for a strong and uniform bond
- Overlooking the importance of evenly distributing clamping pressure for optimal adhesion.
Best Practices for Clamping With Liquid Nails
Utilizing proper clamping techniques when working with Liquid Nails is essential for ensuring a strong and durable bond between materials. To achieve optimal results, it is crucial to follow best practices during the clamping process. Firstly, ensure that the surfaces to be bonded are clean, dry, and free of any contaminants that may compromise the adhesive's effectiveness. Apply the Liquid Nails generously to one of the surfaces and then gently press the materials together. Once in position, use clamps to hold the materials firmly in place while the adhesive sets. When selecting clamps, opt for ones that distribute pressure evenly across the bonded area to prevent uneven curing or potential slippage. Additionally, consider using temporary supports or braces to reinforce the bond further, especially in vertical applications where gravity may pull the materials apart. By adhering to these best practices, you can maximize the strength and durability of your Liquid Nails bond, ensuring a reliable and long-lasting result.
Frequently Asked Questions
Can I Use Liquid Nails Without Clamps?
While clamps can enhance the bonding process, Liquid Nails can be used without them in some cases. Factors like the weight of the materials being bonded and the drying time required influence the need for clamps.
Are There Any Specific Types of Clamps Recommended for Use With Liquid Nails?
When working with liquid nails, specific clamps, like spring clamps or bar clamps, can enhance the adhesive's effectiveness by ensuring a secure bond during the drying process. These tools provide stability and pressure for optimal results.
How Long Should I Leave the Clamps on After Applying Liquid Nails?
After applying Liquid Nails, it is recommended to leave the clamps on for at least 24 hours to ensure proper adhesion and bonding. This extended period allows the adhesive to cure fully, enhancing its strength and durability.
Can I Apply Pressure to the Clamped Area While the Liquid Nails Is Still Drying?
While it's generally recommended to avoid applying pressure to the clamped area during the drying process of Liquid Nails, certain applications may benefit from light pressure. Consult the product guidelines for specific recommendations to ensure optimal results.
Are There Any Specific Safety Precautions to Consider When Using Clamps With Liquid Nails?
When using clamps with Liquid Nails, specific safety precautions are crucial. Ensure proper ventilation, use eye and skin protection, follow manufacturer guidelines, and be cautious of flammability. Always store materials securely and keep away from children.