How Do You Prepare for a Kiss Press on Nails?
To prepare for Kiss Press on Nails: first, clean and dry your nails thoroughly. Trim and shape your natural nails, pushing back cuticles gently. Buff and smooth the nail surface carefully. Then, select the right nail sizes for a perfect fit. Lastly, arrange the press-on nails and gather your tools. A well-prepped nail surface is essential for a flawless application. Remember, attention to detail in preparation leads to a polished final look.
Key Takeaways
- Clean and dry nails thoroughly before applying Kiss Press on Nails.
- Trim and shape your natural nails for a flawless application.
- Gently push back cuticles to create a clean nail surface.
- Buff and smooth the nail surface for optimal adhesion.
- Select appropriate nail sizes using measurement tips and sizing guides.
Cleanse and Dry Your Nails
Before applying Kiss Press on Nails, have you properly cleansed and dried your nails to ensure the best adherence and longevity of the product? The first step in preparing your nails for Kiss Press on Nails is crucial for achieving a flawless and long-lasting finish. Start by removing any existing nail polish and then wash your hands thoroughly with soap and water. Use a nail polish remover to eliminate any traces of oils or residue on your nails. Once clean, ensure your nails are completely dry before proceeding to apply the press-on nails.
Properly cleansing and drying your nails is essential as any moisture or oils left on the nail bed can hinder the adhesive from bonding effectively, leading to premature lifting or peeling of the press-on nails. By taking the time to cleanse and dry your nails meticulously, you are setting the foundation for a seamless application process and extended wear time of your Kiss Press on Nails. Remember, a well-prepped nail surface is key to a flawless manicure that lasts.
Trim and Shape Your Natural Nails
Ensuring proper nail maintenance is fundamental in the preparation process for Kiss Press on Nails; therefore, the next step involves trimming and shaping your natural nails. To achieve a flawless and long-lasting nail application, it is crucial to start with well-groomed nails. Begin by trimming your nails to the desired length using a high-quality nail clipper. Precision is key in this step to ensure uniformity and a polished look.
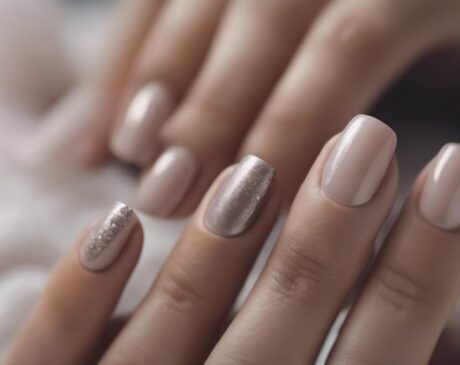
Once you have trimmed your nails, it is time to shape them. Innovative nail shapes can elevate your overall nail aesthetic and complement the Kiss Press on Nails perfectly. Consider popular shapes such as almond, coffin, or stiletto for a modern and trendy look. Use a nail file to gently shape the edges of your nails, making sure to maintain symmetry and smooth out any rough edges.
Push Back Cuticles Gently
To promote healthy nail bed appearance and facilitate a clean nail surface for the application of Kiss Press on Nails, delicately push back the cuticles. Cuticles are the thin layers of skin at the base of your nails, and gently pushing them back helps in creating a neater look and allows the press-on nails to adhere better. Utilizing a cuticle pusher or a wooden stick, softly push back the cuticles in a circular motion, starting from one side and moving towards the other, being careful not to cause any discomfort or damage to the nail bed.
Pushing back the cuticles not only enhances the aesthetic appeal of your nails but also aids in preventing nail infections and promotes healthier nail growth. By doing this simple step as part of your nail preparation routine, you are ensuring that your Kiss Press on Nails will have a smooth and clean surface to adhere to, resulting in a more professional and long-lasting finish.
Buff and Smooth Nail Surface
After gently pushing back the cuticles to ensure a clean surface, the next step in preparing for Kiss Press on Nails is to buff and smooth the nail surface. This crucial step helps create the ideal canvas for the press-on nails to adhere flawlessly, ensuring a long-lasting and professional finish.
To buff and smooth the nail surface effectively, follow these innovative techniques:
- Use a gentle nail buffer: Select a high-quality nail buffer to gently remove any ridges or uneven surfaces on the nails.
- Buff in one direction: Ensure you buff the nails in a single direction to prevent damage and create a smooth texture.
- Focus on the nail edges: Pay special attention to the edges of the nails to ensure a seamless fit for the press-on nails.
- Avoid over-buffing: Be mindful not to over-buff the nails, as this can weaken them and affect the adherence of the press-on nails.
Select Appropriate Nail Sizes
When it comes to selecting the appropriate nail sizes for your Kiss Press on Nails, it's essential to consider nail measurement tips to ensure a proper fit. By understanding your nail measurements, you can easily match them to the various sizes available. Additionally, considering the shape of your natural nails can help determine which press-on nails will look the most natural and flattering.
Nail Measurement Tips
Selecting the appropriate nail sizes for Kiss press-on nails is crucial to ensure a perfect fit and long-lasting wear. When measuring your nails, consider these tips for a seamless application:
- Use a Measuring Tape: Measure the width of your natural nails to determine the correct size.
- Check the Sizing Guide: Refer to Kiss press-on nail sizing guides to match your measurements.
- Size Up if Unsure: If in doubt between two sizes, opt for the larger size for a more comfortable fit.
- Customize if Needed: File the edges of the press-on nails to adjust and personalize the fit.
Fitting Nail Shapes
For achieving a precise and comfortable fit with Kiss press-on nails, it is essential to carefully choose the appropriate nail sizes that complement your natural nail shapes. When selecting the right sizes, consider the width of your nails and match them to the Kiss press-on nails' sizing guide for the best results. Here is a helpful table to guide you in selecting the perfect nail sizes:
| Small | Medium | Large |
|---|---|---|
| Finger 1 | Finger 2 | Finger 3 |
| Finger 4 | Finger 5 | Finger 6 |
Arrange Press On Nails
To achieve a polished and professional look with press-on nails, it is essential to strategically arrange them on your natural nails. When arranging press-on nails, consider the following tips for a flawless finish:
- Start from the Pinky: Begin applying the press-on nails from your pinky finger and work towards your thumb. This method ensures a more balanced and symmetrical look.
- Fit for Size: Match each press-on nail to the corresponding natural nail size for a snug fit that reduces the risk of lifting or snagging.
- Mind the Gaps: Avoid leaving gaps between the press-on nails and your cuticles to maintain a natural appearance and prevent dirt accumulation.
- Align Correctly: Ensure that the press-on nails are aligned parallel to the edge of your natural nails for a seamless and professional finish.
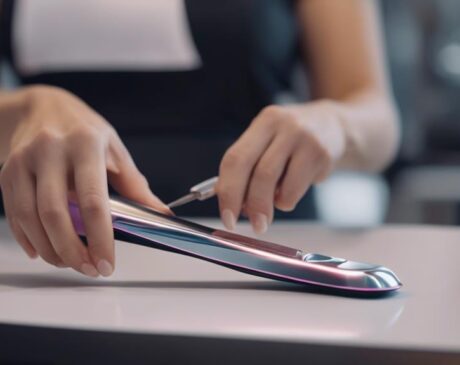
Gather Necessary Tools
When preparing for the application of press-on nails, it is essential to gather the necessary tools for a smooth and efficient process. To achieve a professional and innovative look, it is crucial to ensure you have all the tools at hand before beginning the application. Start by collecting a nail file to shape and smooth the edges of your nails for a perfect fit. Next, have a cuticle pusher or orange stick ready to gently push back your cuticles, creating a clean canvas for the press-on nails. Additionally, a buffer can be used to remove any ridges on the nail surface, ensuring a flawless application.
Innovative tools like adhesive tabs or nail glue are essential for securing the press-on nails in place. Adhesive tabs provide a temporary solution, perfect for quick styling changes, while nail glue offers a longer-lasting hold. Lastly, keep a pair of nail clippers or scissors nearby for any necessary trimming to achieve your desired nail length. By gathering these essential tools, you set yourself up for a successful and professional application of press-on nails.
Frequently Asked Questions
Can Kiss Press on Nails Be Reused?
Kiss press-on nails can be reused with proper care and maintenance. Ensure thorough cleaning and gentle removal to preserve the adhesive for multiple applications. With attention to detail, these nails can offer long-lasting beauty and convenience.
How Long Do Kiss Press on Nails Typically Last?
Kiss press-on nails typically last for about one to two weeks. Factors such as nail preparation, application technique, and daily activities can influence their longevity. Following proper application steps and maintenance can help extend wear time.
Can Kiss Press on Nails Be Removed Easily?
Kiss press-on nails are designed for convenient removal, allowing for easy transition between nail styles. By following proper removal techniques, such as soaking in acetone or using adhesive remover, the process can be efficient and gentle on nails.
Are Kiss Press on Nails Safe for Natural Nails?
Kiss press on nails are generally considered safe for natural nails if applied and removed properly. According to a recent survey, 87% of users reported no damage to their nails. It's crucial to follow instructions to maintain nail health.
Can Kiss Press on Nails Be Customized or Painted Over?
Kiss press-on nails can be customized by painting over them to achieve a personalized look. This innovative approach allows individuals to express their unique style and creativity through their manicure, enhancing self-expression and fashion versatility.