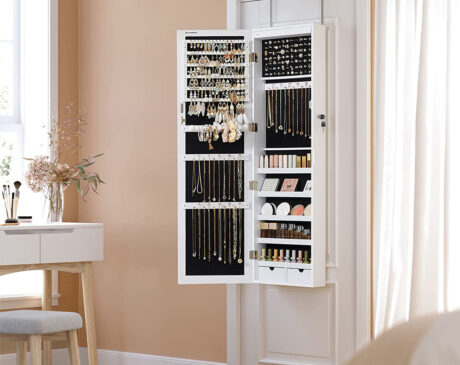
How to wall mount jewelry armoire?

Wall-mounted jewelry cabinets blend functionality and elegance in home décor, offering a chic solution for organizing your cherished accessories. If your dresser is cluttered or you desire to display your jewelry collection in a way that is both functional and aesthetically pleasing, mounting a jewelry armoire on the wall is a clever move. This comprehensive guide is designed to walk you through the nuances of mounting a jewelry armoire with precision and finesse.
What you’ll need.
To get started on this DIY project, gather the following essentials:
- The jewelry cabinet of your choice
- A reliable stud finder
- A level to ensure accuracy
- An electric drill with a variety of bit sizes
- Properly sized screws and wall anchors
- Pencils for marking points
- Tape measure for spacing and alignment
Choosing the Right Placement
Strategic placement of a closet can enhance its utility as well as its contribution to the ambiance of the room.
Height and space considerations
Determining the ideal height is crucial; it should cater to your convenience and usually be at or slightly below your eye level for ease of use. Additionally, make sure there is enough space for closet doors to open unobstructed, considering future furniture rearrangements.
Light and Accessibility Considerations
Well-lit areas will enhance the visibility of your jewelry, so choose a location with plenty of natural light or where supplemental lighting can be installed. Accessibility is key – avoid tucking your closet behind a door or in a tight corner, which may hinder your access.
Prepare for Installation
Proper preparation can set the stage for a perfect installation.
Measure and mark the walls
Use a tape measure to determine the exact location on the wall. Use a pencil to lightly mark the intended location where you will later secure the closet. This is the blueprint for your project, so accuracy here is crucial.
Finding Studs and Pre-Drilling Holes
Your stud finder is essential for locating wall studs, which provide a sturdy anchor for your closet. Once you’ve found your studs, mark their locations and pre-drill holes to simplify the installation process and minimize wall damage.
Installing the closet
With your preparations complete, you are now ready to install your closet.
Installing the Mounting Bracket
Your closet should include a mounting bracket – a key piece of hardware for secure installation. Secure it to the wall, taking special care to keep it level. This is the backbone of your setup; it must be securely fastened directly to the studs.
Securing the closet to the wall
Hang the closet on the already secured brackets. Use a drill and screws to hold it in place, making sure it is securely fastened. If there are no studs where you need them, then wall anchors will be your first choice for secure fixing.
Final touches.
It’s nearly finished but needs some finishing touches.
Leveling and Adjusting
Use the leveling tool to make sure the closet is perfectly level. Making a few small adjustments now will prevent hassles later and ensure that your closet is both functional and aesthetically pleasing.
Add Extra Support If Necessary
If the closet wobbles or feels unstable, don’t hesitate to reinforce it. Additional screws or secondary supports may be needed to increase stability.
Decorating and Organizing
It’s time to personalize your newly installed closet.
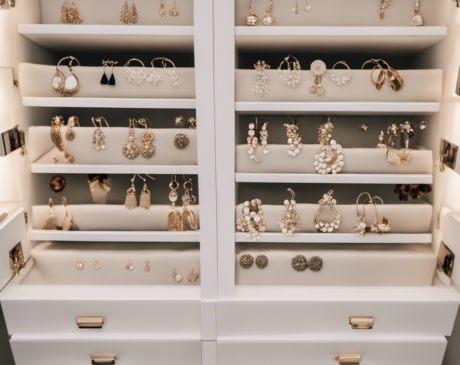
Arrange jewelry for aesthetic and practical purposes
Fill your closet with care, keeping frequently worn items out of reach and precious items in secure compartments. The arrangement should be both visually appealing and organized.
Maintenance Tips.
Regular maintenance is necessary to ensure the longevity and continued appeal of your wall-mounted jewelry cabinet. Regular checks for installation safety, cleaning procedures and careful handling will make your closet the focal point of your space.
Installing a wall-mounted jewelry armoire is more than just a home improvement task; it’s a rich DIY journey that culminates in the satisfaction of creating a beautiful and functional space. With this guide, you’ll learn the steps to choosing the perfect location, preparing your tools, safely installing your armoire, and adding a personal touch that reflects your style.
Frequently Asked Questions
What do I do if I can’t find the studs?
If studs are not available in your desired location, use high-quality wall anchors designed for your closet weight and wall type.
Can I install a jewelry closet on drywall?
Yes, you can install your armoire on drywall, but you must use the proper anchors and follow the weight guidelines to ensure a secure installation.
How do I make sure my jewelry closet is straight and level?
Use a level when installing the brackets and again after hanging the armoire. Use the mounting hardware to make any necessary adjustments to ensure it is perfectly level.
How often should I check the stability of my installed jewelry cabinet?
It is wise to check the stability every few months, especially if you open and close the closet frequently or live in an area that vibrates due to heavy traffic or construction.
Can I mount my jewelry cabinet on the wall without drilling holes?
Drilling holes will ensure a stable installation, but if you are unable to drill holes, consider using a strong adhesive mounting system or a freestanding closet. Please note that adhesive mounts have limitations and may not be able to support as much weight.